
CONTENTS
|
CHAPTER 1:
INTRODUCTION |
|
CHAPTER 2:
GETTING STARTED |
|
CHAPTER3:
PRE-SELECTION |
|
3.1 Selecting a complete patient folder
3.2 Selecting a specific study 3.3 Selecting
a specific series |
|
CHAPTER 4:
NAVIGATION 4.1 Image
navigation |
|
CHAPTER 5:
TOOLS |
|
CHAPTER 6:
MISCELLANEOUS 6.1 Floating
menus 6.2 Floating
image navigation bar |
1.
INTRODUCTION
Every CD-ROM that is produced by the CDP
CD-Printer contains:
·
The original medical
images in their DICOM format
·
A Specially designed
post processing software DIADISK
The images are recorded on the CD in compliance with
the DICOM standard’s guidelines for recording images on transferable
media. This enables the
manipulation and post processing of the images on:
·
Any PC using CDP’s
DIADISK software.
·
Any third party
workstation that is capable of loading DICOM images from a CD.
The DIADISK software is a result of extensive
research to realize a medical image manipulation and post processing software
that will operate automatically from a transferable media (e.g. CD_ROM) while
adhering to the following guidelines:
·
Does not require any
installation and does not leave any residue on the computer.
·
Operates on almost any
PC and requires very minimal resources.
·
High speed performance
allowing for maximum throughput.
·
Includes the most
advanced features while maintaining an intuitive user friendly user interface.
2. GETTING STARTED
Place CD in CD-ROM drive
Wait for a few seconds while the CD-ROM drive completes the process of accelerating the CD.
The CDP Viewing software should run automatically on any computer unless the AUTOPLAY function of the CD-ROM drive has been disabled.
! Troubleshooting
If within 20 seconds there is no indication that the
program is running:
This means that the AUTOPLAY function of the CD-ROM
drive has been disabled. In this
case the software must be triggered manually:

·
Double click My Computer in the Desktop ………..
![]()
·
Double click the CD-ROM icon …………………….
![]()
·
Double click the Viewer Application icon …………
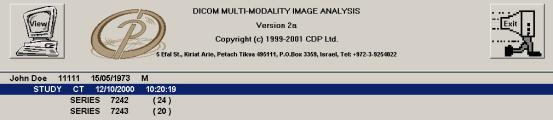
3. PRE-SELECTION
The
DIADISK software automatically launches the pre-selection window displaying the
contents of the CD-ROM.
The
contents are arranged in a three level hierarchy:
|
·
Patient |
Name ID Date of birth Sex |
A CD-ROM can contain the studies of several
patients |
|
·
Study |
Type of study (CT, MR..) Study date Study time Anatomical description |
Every patient can contain several studies |
|
·
Series |
Series No. No. of images within series |
Every study contains at least one series |
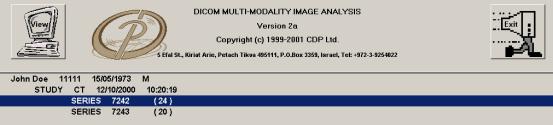
3.1
Selecting a complete patient folder

3.2 Selecting a
specific study
3.3 Selecting
a specific series
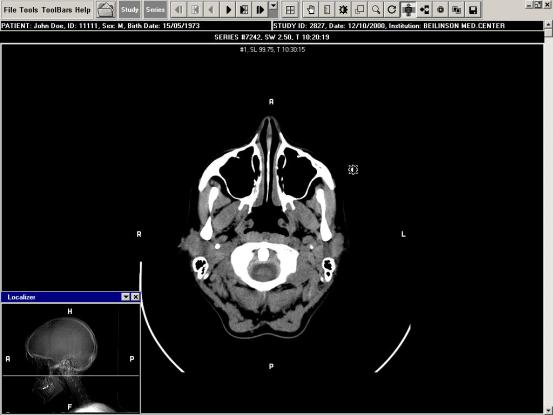
After completing the selection press the VIEW
button…….
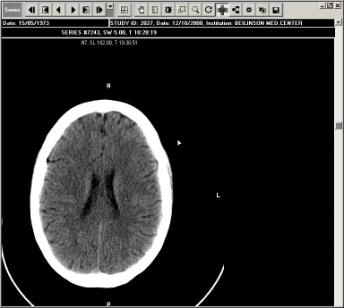
The first image of selected images will appear on the
main application window.
The user can navigate:
·
Through the Images
within a series
·
Between series (Without
the need to reselect images)
·
Between studies of the same
patient (Without the need to reselect images)
Image navigation toolbar…………………...…![]()
|
Button |
Comments |
|
|
Can be Pressed continuously |
|
|
Can be Pressed continuously |
|
|
|
|
|
|
|
|
Useful for navigating between pages when viewing a
matrix of images |
|
|
Useful for navigating between pages when viewing a
matrix of images |
|
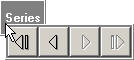
The Study and Series navigation toolbar is invoked by
holding the cursor over the Study or Series icons respectively |
|
After moving the cursor over the Study or Series
button a navigation toolbar will drop down allowing the following navigation
options:
|
·
Study |
Previous Study Next Study |
|
|
·
Series |
First Series Previous Series Next Series Last Series |
|

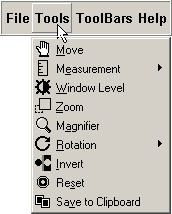
The DIADISK software was designed to cater to
three different preferences of user interfaces:
|
Menu user interface. |
|
|
Icon Toolbar |
|
|
Mouse Right Click anywhere on the
work area invokes a user interface. |
|
|
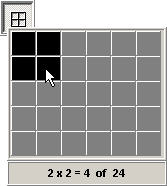
Multiple image display
|
Moving the Mouse Pointer over this icon will cause a
dynamic matrix to drop down enabling the user to select a display matrix. |
|
|
Pan
|
Allows panning of the image when it’s size exceeds
the limits of the work area. |
Useful after performing Zoom functions. |
|
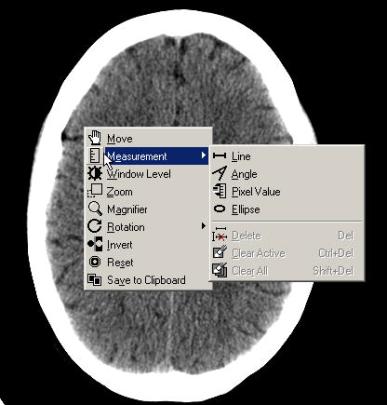
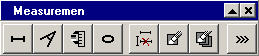
Measurements |
Pressing this icon will toggle a measurement
toolbar |
·
Length ·
Angle ·
Point density ·
Ellipse density ·
Delete measurements ·
Modify measurement
colors |
|
Window / Level
|
Enables dynamic manipulation of the contrast and
brightness of the image. Can be achieved by moving the cursor within the
image, or by using the floating window functions |
|
|
Zoom
|
Enables dynamic zooming in/out of the image Can be achieved by moving the cursor within the
image, or by using the floating window functions |
|
|
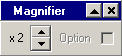
Magnifier
|
Moving the magnifier over the image will magnify
the area under the magnifier by a factor that can be controlled from the
floating window menu |
|
|
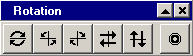
Rotation
|
Enables rotation, flipping and mirroring of the
image/s |
|
|
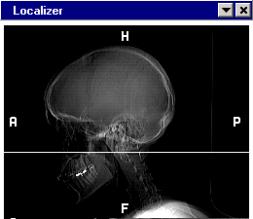
Localizer\Scout
|
Toggles a floating Localizer\Scout window, which
graphically displays the location of the slice. |
|
|
Invert
|
Inverts the image |
|
|
Reset
|
Restores the original image attributes |
There is a general reset button which restores all
image attribute to the original form Within every function tools there is a reset
function which cancels the specific attributes of the function (e.g. Zoom,
Window\Level…..) |
|
Copy to Clipboard
|
Enables selecting a region of interest for copying
to the Windows clipboard for pasting into other applications. |
Convenient for pasting images into: ·
Medical reports ·
Presentations |
|
Save image
|
Save image\s in a standard windows bitmap format
for use in non-medical environment |
Useful for e-mail attachments |


Every time a tool is activated a floating window appears
on the work area enabling additional parameters of that tool to be modified.
When a new function is called up the previous
floating window will be added to the top toolbar.
With
each floating window the user can:
|
Minimize |
Adds tools to
top toolbox. |
|
Maximize
|
Invokes the
tools in a floating window format in the work area. |
|
Close |
Closes the
tools floating window without adding it to the top toolbar |
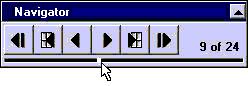
6.2 Floating
image navigation bar
Pressing the ![]() Maximize
button within the image navigation tool will toggle a floating navigation bar
that can be conveniently placed anywhere on the screen.
Maximize
button within the image navigation tool will toggle a floating navigation bar
that can be conveniently placed anywhere on the screen.
|
The
floating tool bar includes a Jog Shuttle that enables the user to
dynamically move through the stack of images. |
|
6.3 Going back
to Pre-Selection window
|
Pressing
this icon will bring you back to the initial pre-selection window. This function is useful for CD’s
containing several patients |
|
6.4 Terminating the
application
|
Pressing any
of these icons at any time will terminate the application. |
|
